Root Rot Recovery Guide: How to Save an Overwatered Plant with Black Roots
Published Date:
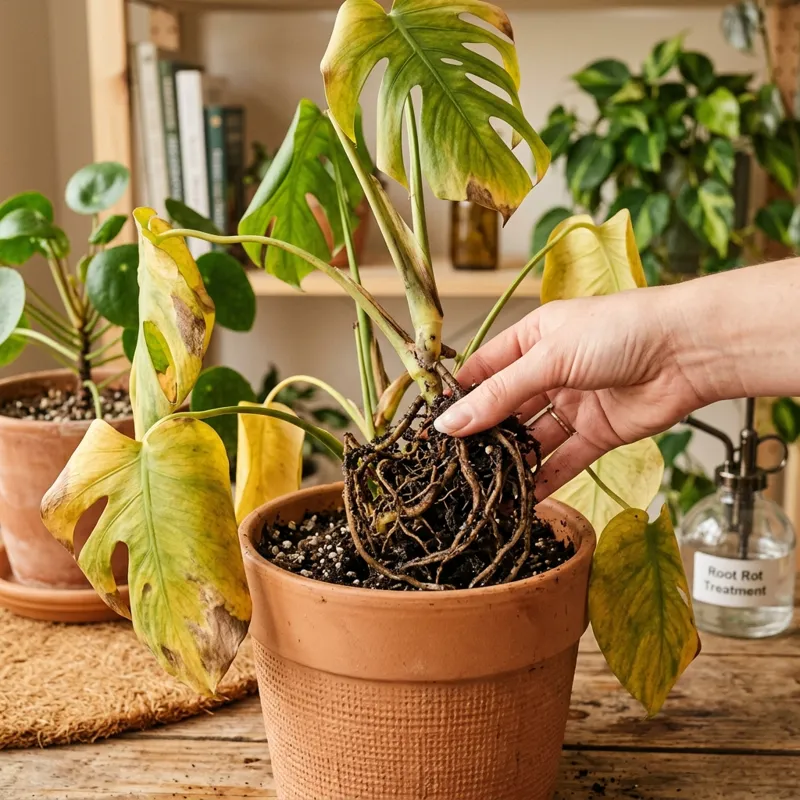
Root rot is arguably the most dreaded phrase in the indoor gardening community. It is one of the most common, rapid, and devastating issues for houseplants, and it is almost entirely caused by human error. When a plant receives too much water or lacks proper drainage, the soil turns into a dense, muddy swamp. This suffocates the roots and creates the perfect breeding ground for destructive soil-borne fungi. Once the roots begin to rot, they turn black and mushy, completely cutting off the plant’s ability to absorb water or nutrients.
If your plant’s leaves are rapidly turning yellow, wilting despite the soil being soaking wet, or emitting a foul, swampy smell from the pot, root rot is likely the culprit. You might even notice Monstera leaves developing yellow spots as a first warning sign. However, a diagnosis is not an automatic death sentence. Fortunately, if caught early enough and treated aggressively, you can save your green friends. Here is the step-by-step recovery guide recommended by our AI botany assistant Kök.
The Core Problem: How Overwatering Kills
Most beginners assume that root rot is just the plant “drinking too much water.” In reality, root rot is suffocation followed by a fungal infection.
The Need for Oxygen
Plant roots do not just absorb water; they must also breathe oxygen. In healthy, well-aerated potting soil, there are thousands of microscopic air pockets between the soil particles. When you overwater a plant, or if you use a pot without drainage holes, water fills every single one of those air pockets. The roots are left drowning, unable to perform basic gas exchange.
The Fungal Attack
When roots suffocate and begin to die off, their cellular walls break down. This dead organic matter sitting in wet, anaerobic (oxygenless) conditions is a feast for naturally occurring soil fungi, specifically Pythium, Phytophthora, or Rhizoctonia. These fungi rapidly multiply, attacking not just the dead roots, but spreading aggressively to consume the remaining healthy roots as well. The fungal infection travels up the root system into the main stem of the plant. By the time you see the leaves wilting up top, the war underground has already been raging for weeks.
Step-by-Step Solution: Surgical Root Rot Recovery
Treating root rot requires immediate and decisive action. You cannot cure it by simply letting the soil dry out. Once the fungal infection has taken hold, you must perform surgery to physically remove the rot.
Step 1: Carefully Remove the Plant
First, you must assess the damage. Lay down some newspaper and gently tip the pot sideways. Slide the plant out. Do not pull the plant forcefully by its main stem, as the weakened, rotted roots will snap off entirely. Once out, gently massage the root ball to shake off the old, soggy soil so you can inspect the root system clearly. You may need to run the root ball under a gentle stream of lukewarm water to wash away the mud.
Step 2: Inspect and Prune the Roots
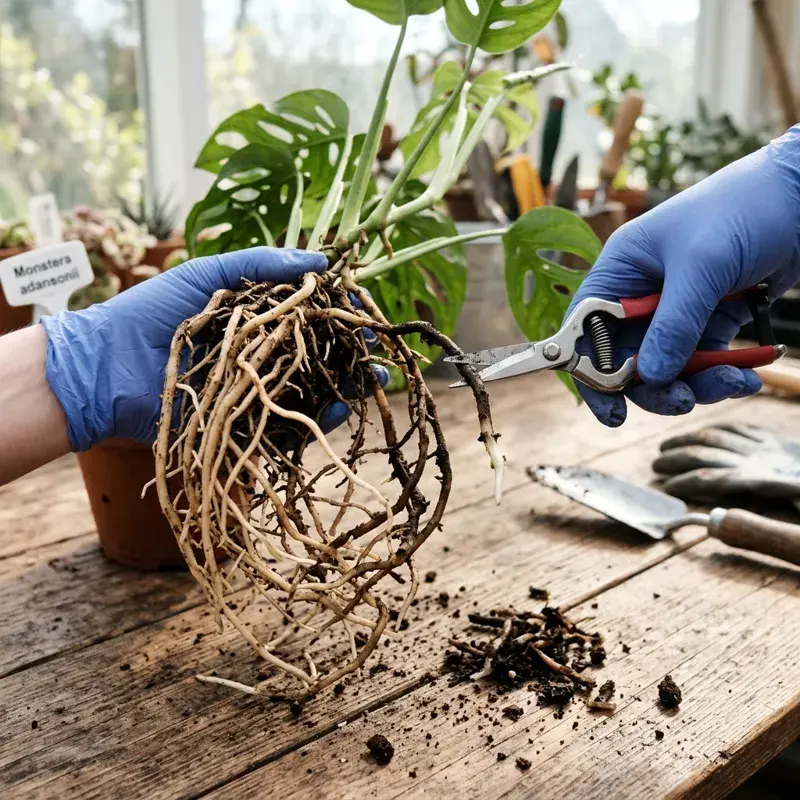
You must differentiate between healthy tissue and diseased tissue. Healthy roots are firm, plump, and usually white, light tan, or pale yellow. When you gently tug on a healthy root, it holds strong. Rotted roots are black, dark brown, slimy, and mushy. If you pull on a rotted root, the outer sheath will easily slide off, leaving behind a hair-like, dead inner string.
- Action: Using sharp, clean pruning shears (sterilized by wiping them with rubbing alcohol), ruthlessly snip away all the rotted black roots. Cut about a centimeter above the rot into the healthy tissue to ensure you remove all the infection. Do not be timid; even if you have to cut away 80% of the root system, it must be done.
Step 3: Sterilize the Remaining Root Ball
Even after pruning, microscopic fungal spores remain on the healthy roots. To ensure any lingering spores are destroyed, you must sterilize the remaining root mass.
Mix a diluted hydrogen peroxide solution using 1 part 3% hydrogen peroxide (available at any pharmacy) to 2 parts room-temperature water. Submerge the remaining healthy roots in this solution for about 10-15 minutes. The peroxide will bubble and fizz as it kills the fungal and bacterial cells, providing a clean slate for replanting.
Step 4: Repot in Fresh Soil and a Clean Pot
Never reuse the old soil, as it is heavily contaminated. If you plan to reuse the old pot, you must scrub it thoroughly with hot water, soap, and a mild bleach solution to kill any clinging spores. Ideally, use a new nursery pot with excellent, large drainage holes.
Fill the pot with a fresh, highly aerated potting mix. To prevent a recurrence, amend standard indoor potting soil with heavy handfuls of perlite, orchid bark, or pumice. These chunky amendments guarantee excellent drainage and maintain those vital oxygen pockets even when the soil is wet.
Step 5: Adjust the Canopy
If you removed a significant portion of the plant’s roots, the remaining tiny root system will struggle to support a massive canopy of leaves. It will lose water through transpiration faster than the small roots can absorb it. To reduce stress on the plant, prune back some of the older, lower foliage.
Prevention: What to Do Going Forward
After repotting, the plant will be in severe shock. Your ongoing care routine must adapt.
The Recovery Phase
Give the newly potted plant a very light watering just to settle the fresh soil. Place it in a warm, bright spot with plenty of indirect sunlight. Do not place it in a dark corner, as light is essential for the plant to generate the energy required to grow new roots. If you are unsure about your lighting, review our houseplant lighting guide for indirect light.
Do not fertilize the plant for at least 4 to 6 weeks. Fertilizer salts will burn the fragile new roots that are trying to emerge.
Mastering the Watering Routine
Going forward, you must let the soil dry out significantly before watering again. For tropicals, wait until the top 50% of the soil is completely dry. Use your finger to physically probe the soil deep down, or use a wooden chopstick. Never rely on a calendar schedule, and never let a plant sit in a saucer of runoff water for more than 15 minutes.
When to Seek More Help / Edge Cases
If you unpot your plant and find that 100% of the roots are black, mushy, and smelly, the root system is entirely dead. Repotting will not save it. In this tragic edge case, your only option is propagation. If the main stem of the plant is still green and firm, use sterilized shears to cut the stem completely above the rot line. You can then place this healthy cutting in a jar of clean water to encourage entirely new roots to grow over the next few weeks, effectively starting the plant over from scratch.
Quick Summary
- Identify the signs: Rapid yellowing leaves, wet soil, wilted appearance, and a swampy smell.
- Unpot carefully: Remove the soil and wash the roots to see the damage.
- Cut it away: Use sterilized shears to cut off all black, slimy, mushy roots until only firm roots remain.
- Sterilize: Soak the remaining healthy roots in a 1:2 mixture of hydrogen peroxide and water.
- Use fresh soil: Repot into a clean pot using brand new, well-draining soil mixed with perlite.
- Prune the leaves: Cut back some foliage to reduce stress on the diminished root system.
- Let it dry: Allow the soil to dry out significantly before watering again to prevent reinfection.
Frequently Asked Questions
What does root rot smell like?
Root rot has a very distinct, foul odor. It smells like a stagnant swamp, decaying organic matter, or sulfur (rotten eggs). If you water your plant and notice a bad smell rising from the pot, rot is almost certainly occurring.
Can a plant recover if all of its roots have rotted?
No, a plant cannot survive with zero roots. If the entire root system is mushy, you must cut the healthy green stem off above the rot and attempt to propagate the cutting in water to start a new root system.
Should I water the plant immediately after repotting it?
Yes, but only a very light watering. The goal is to gently settle the fresh, airy soil around the remaining roots without instantly drowning them again. Ensure all excess water drains out the bottom immediately.
Why is my plant wilting if the soil is soaking wet?
Wilting happens when leaves are not receiving water. If the soil is wet but the roots are rotted and dead, they cannot physically absorb the moisture. The plant is essentially dying of thirst while sitting in a pool of water.
Will the yellow leaves turn green again after I fix the rot?
No. Once a leaf turns yellow due to root rot, the cellular structure is permanently damaged. The leaf will eventually die and fall off. Your goal is to save the main plant so it can produce new, healthy green leaves in the future.
Keep Your Plants Safe with Kök!
Not sure how to schedule your plant care or how much water your plant needs? Download the Kök app. Our advanced AI diagnostics and smart scheduling tool will tell you exactly when to water, fertilize, and repot based on your local climate and plant species. Download Kök App Now and keep your plants thriving!