Orchid Care for Beginners: Watering, Light, and Repotting
Published Date:
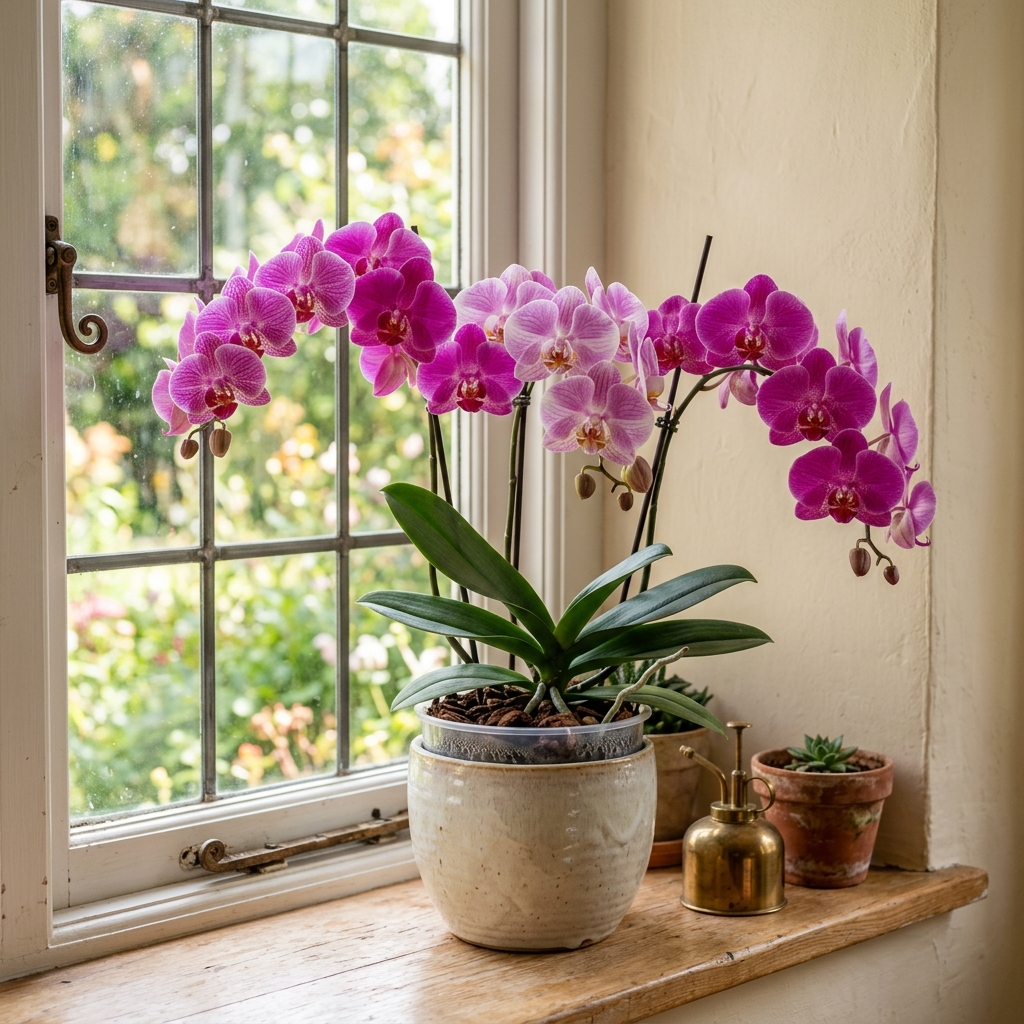
Orchids are often perceived as delicate and difficult to maintain, but with the right knowledge, they can be a resilient and stunning addition to any indoor space. If you’ve recently brought an orchid home, or if you’re struggling to keep one alive, you’re not alone. Many new plant owners feel intimidated by the unique needs of these exotic flowers. However, by understanding their natural habitat and replicating those conditions in your home, you can enjoy their breathtaking blooms year after year. This guide to orchid care for beginners will walk you through the essential steps to ensure your plant not only survives but thrives.
Orchids belong to a vast and diverse family of plants, with the Phalaenopsis (moth orchid) being the most common variety found in homes and garden centers. These epiphytes grow on trees in their natural tropical environments, which means they don’t grow in soil like most houseplants. Instead, they rely on aerial roots to absorb moisture and nutrients from the humid air and rainfall. Recognizing this fundamental difference is the first step toward successful orchid care. In the following sections, we will explore the three most critical aspects of their maintenance: watering, lighting, and repotting. By mastering these elements, you’ll be well on your way to becoming a confident and capable orchid parent.
Understanding Your Orchid’s Watering Needs
One of the most common reasons orchids fail to thrive in a home environment is improper watering. Unlike traditional houseplants that prefer their soil to be evenly moist, orchids are highly susceptible to root problems if they are kept too wet. Because they naturally grow on tree bark, their roots need plenty of air circulation. When an orchid is planted in a typical potting mix and watered frequently, its roots can suffocate and begin to decay. Overwatering often leads to root damage; for more on this, check our root rot recovery guide.
How Often to Water Your Orchid
The frequency of watering your orchid depends on several factors, including the type of potting medium, the temperature, and the humidity levels in your home. As a general rule of thumb, it’s best to water your orchid once every one to two weeks. However, rather than sticking to a strict schedule, it’s more effective to monitor the plant’s moisture levels. You can do this by examining the roots and the potting medium. If the roots appear plump and green, the plant is well-hydrated. If they look silvery-white or gray, it’s time to water. Additionally, you can insert a wooden skewer or your finger an inch into the medium; if it feels dry, your orchid is ready for a drink.
The Best Watering Techniques
When it is time to water, it’s crucial to do it thoroughly but allow for complete drainage. A popular method is the “soak and drain” technique. Simply place your orchid’s inner pot (the one with drainage holes) in a basin or sink filled with room-temperature water. Let it soak for 10 to 15 minutes, allowing the roots and potting medium to absorb the moisture. Afterward, lift the pot out and let all the excess water drain completely before returning the orchid to its decorative outer pot. Never let your orchid sit in standing water, as this is a guaranteed recipe for rot.
Finding the Perfect Light for Orchids
Light is a vital component of orchid care, as it directly impacts their ability to photosynthesize and produce those magnificent blooms. Orchids require bright, indirect light to flourish. Understanding indoor houseplant lighting requirements is essential for mimicking the dappled sunlight they receive under the canopy of tropical forests. If an orchid receives too little light, it may survive, but it will rarely rebloom and its leaves will turn a dark, dull green.
Signs of Optimal Lighting
To determine if your orchid is getting the right amount of light, simply look at its leaves. A healthy, well-lit orchid will have leaves that are a bright, grassy green or slightly yellowish-green. If the leaves are dark forest green, the plant needs more light. Conversely, if the leaves are a pale yellow, bleached, or have brown, scorched patches, the plant is receiving too much direct sunlight and should be moved to a shadier spot.
Best Locations in Your Home
An east-facing window is often the ideal location for an orchid, as it provides gentle morning sunlight without the intense heat of the afternoon. A south or west-facing window can also work, but you will need to filter the light using sheer curtains or blinds to protect the plant from sunburn. Keep in mind that as the seasons change, the angle and intensity of the sun will also shift, so you may need to adjust your orchid’s placement throughout the year to maintain optimal lighting conditions.
The Essentials of Repotting Your Orchid
Repotting is a necessary part of orchid care, but it’s a task that should only be done when absolutely necessary. Orchids generally prefer to be slightly root-bound, and frequent repotting can stress the plant and disrupt its blooming cycle. However, when the potting medium begins to break down and decompose, it can restrict airflow to the roots and retain too much moisture, leading to rot. You should typically plan to repot your orchid every one to two years, or whenever you notice the potting mix has turned into a mushy, soil-like consistency.
Choosing the Right Potting Medium
Because orchids do not grow in soil, you must use a specialized potting medium that provides excellent aeration and drainage. The most common components of an orchid mix are fir bark, sphagnum moss, perlite, and charcoal. Bark chips are excellent for drainage and airflow, while sphagnum moss helps retain moisture. You can purchase pre-mixed orchid potting soil, or you can create your own blend depending on your home’s humidity levels. If your home is dry, you might add more moss; if it’s humid, stick to mostly bark. To provide proper nutrients after repotting, learn the fertilizer basics and NPK ratios.
Step-by-Step Repotting Guide
When you’re ready to repot, wait until the orchid has finished blooming and its flowers have fallen off. Carefully remove the plant from its current pot and gently tease away the old potting medium from the roots. Take this opportunity to inspect the root system and trim away any dead, hollow, or mushy roots using sterilized scissors or pruning shears. Healthy roots will be firm and white or green. Once the roots are clean, place the orchid into a new, slightly larger pot with drainage holes. Fill in the spaces around the roots with fresh potting medium, tapping the pot gently to settle the mix. Avoid packing the medium too tightly, as the roots still need room to breathe. Wait a few days before watering to allow any trimmed roots to heal.
Encouraging Your Orchid to Rebloom
One of the most rewarding aspects of orchid care is coaxing the plant to bloom again. After the initial flowers fade, many beginners mistakenly believe the plant is dead and throw it away. However, with patience and the right care, your orchid can produce flowers for many years. Once the last flower has dropped, you can either cut the flower spike all the way down to the base to encourage a stronger, more vigorous spike in the future, or you can cut it just above a node (the small bump on the stem) in hopes of a quicker, though sometimes smaller, secondary bloom.
To trigger a new bloom cycle, orchids often need a slight drop in temperature during the night. A difference of about 10 to 15 degrees Fahrenheit between day and night temperatures for a few weeks can stimulate the plant to produce a new flower spike. Continue to provide bright, indirect light and consistent, careful watering during this time. Remember, patience is key: it can take several months for a new spike to form and mature into beautiful flowers.
Frequently Asked Questions
How do I know if I’m overwatering my orchid?
Signs of overwatering include yellowing leaves, a mushy stem, and roots that are brown, mushy, or hollow. The potting medium will also stay wet for prolonged periods. Always ensure the medium is almost completely dry before watering again.
Why are the flower buds on my orchid dropping off before opening?
This condition, known as bud blast, is typically caused by sudden changes in the environment. Drafts, extreme temperature fluctuations, low humidity, or fumes from ripening fruit or natural gas can all cause the buds to drop.
Can I use regular potting soil for my orchid?
No, regular potting soil is too dense and will suffocate the orchid’s roots, leading to root rot. Always use a specialized orchid medium made of materials like bark, perlite, and sphagnum moss.
Should I mist my orchid?
While orchids appreciate humidity, misting can be risky if water accumulates in the crown of the plant (where the leaves join), as this can cause crown rot. Instead, increase ambient humidity using a pebble tray filled with water or a humidifier.
When is the best time to fertilize my orchid?
Fertilize your orchid regularly during its active growing phase (typically spring and summer) using a specialized orchid fertilizer diluted to half or quarter strength. Reduce or stop fertilizing during the winter or when the plant is not actively producing new leaves or roots.
Ready to Transform Your Plant Care Routine?
Mastering orchid care takes a little patience, but the beautiful blooms are well worth the effort. For customized watering schedules, light analysis, and expert advice for all your houseplants, try our smart plant care app.